
DIY Coasters - a la Style Me Pretty
These were made from 4 1/2" X 4 1/2" ceramic tiles.
I bought 3 boxes of tiles from Home Depot. Each 80- tile box cost $12.80 making each tile $ 0.16 . I used the following supplies that I picked up from Michael's all with 40% off coupons.

The mod podge I got for 5.99 - 40% = $3. 59
Aleene's Tacky Glue 1.99 - 40 % = 1.19 times 2 bottles
Pack of foam brushes 1.99 - 40% = 1.19
Felt for backing - . 29 x 60 ( 1 felt sheet made 4 backings) = 17.4 - 25% off coupon = 13.05
I got packs of Damask folders for $1. Each pack had 5 folders and each folder made 8 coasters.
I also bought some aqua paper (not shown) for 0. 59 that made 9 coasters each. I bought 14 = 8.26 - 25% = 6.20
The sealant was also 5.99 - 40% = 3.59
Making it a grand total of $73.40 for 240 coasters/ $30 cents per coaster. I put 4 coasters in each favor so each favor was $1. 20 since I got the wrapping paper free with a gift certificate from Paper and More.
All done and waiting to be handed out.
- First I cleaned the coaster with a paper towel and rubbing alcohol to remove the fine dust.
- Then I used the foam brush to spread the mod podge over the entire surface.
- I then quickly applied the cut paper square that was cut to 4" onto the tile (mod podge dries very quickly).
- I let that dry for an hour then I applied another layer of mod podge.
- I did that 3 times and let it dry overnight.
- The next day I applied the sealant over everything and let that dry overnight.
- I did this in batches of 40 per day so it took a while but if you have a large work surface , you can do more if not all.
- I then stored them in a box for a few weeks and then wrapped them up in aqua paper making them look like Tiffany boxes:

Bridesmaids Bouquets and Men's Bouts
I decided early on that I didn't want real flowers for me and my girls and I. Since crystals were one of my elements, I researched crystal bouquets. I was shocked to see that they cost upwards of $500. Not only did my budget not allow it, I couldn't with all conscience ever pay so much for a bouquet even if I had the money. So I decided to make my own. After many google searches and trips to michael's, I was able to make 4 bouquets for me and my ladies -in-waiting.


They are so sparkly and shiny. I've used aqua ribbon around the stem then made some small bows with sheer white ribbon and added a rhinestone in the center. Even more sparkles. It wasn't at all difficult but very time consuming. I think each bouquet took about 2 weeks since I did a little bit every day.


I bought 30 guage wire and boxes of beads and that was it. The ribbon I already had also bought from Michael's. The other stuff I had at home. With 40% off coupons, each bouquet worked out to about $5 with taxes. So my entire bouquet budget cost about $30 and we can keep them forever. Not too shabby huh?
Aside from the wire and beads I needed:
- a wire cutter
- pliers
- drill (corded or cordless)
- cup hook found at any hardware store or the handle of a wooden hanger works just as well.
- duct or electrical tape
This is the process:
- I cut the wire with a wire cutter to 30".
- I then threaded a bead and moved it to the halfway point of the wire.
- I then bent it so that the two ends met.
- With a wireless drill, yes a craftman drill. The one you would use to drill in screws in a piece of furniture or your wall etc.
- I attached the screw end of the cup hook into the part where the drill bit would go and tightened it. The wire should looked like a loop which you put the end of the cup hook through.
- Pinch the two ends of the wire with the pliers. That will keep it from spinning around when you turn on the drill.
- The cup hook should be against the bead in the middle of the bent wire.
- Turn on the drill and it will spin that wire like nobody's business.
- When it's tight enough, stop the drill and finish tightening it by twisting the bead to tighten it further.
- You should now have a nice straight wire strand with a bead at the end.
To make your bouquet, do this about 500 times. Yes I know, it seems like a daunting task but it'll be so worth it if you want a crystal bouquet. It's totally up to you how big you want it. I used 400 clear beads and 100 silver ones for the ladies and 550 clear and 150 aqua for mine. If you need a step by step photo guide, click here.
CARD BOX 101

This is my card box that I made from scratch. First I got some free shoeboxes from Payless Shoe store. I bought some tiffany blue/aqua wrapping paper from Sophie's favors (a bit pricey but the exact color) and simply wrapped the boxes. Covers and all.
I then cut a slit wide and long enough for the average cards to go through and coved the edge of the slit with rhinestones that I hot glued tot he box. You can also used a strip of double-sided tape and stick the rhinestones onto that if they don't already have sticky backings.
I used 1 1/2 inch ribbon and used double-sided tape to adhere it to the boxes since the hot glue showed through. I found a huge ribbon bow at Michael's for $1.99 and I just hot glued that to the top. Ta da- tiffany stacked boxes and a lovely card box.
Lovely Lovely PARASOLS
The parasols were bought from Save on crafts and although they weren't expensive. I found their shipping to be quite high. It kinda worked out since I added other things and the shipping didn't go up. I think that's the whole point, they want you to buy as much as possible.
Anyway. on to the tutorial:
- I opened a new blank document in Microsoft word and typed the words Just Married.
- I then highlighted them and changed the font to chopin script. (I found the free font on www.dafont.com)
- I also made the font 400. You can do this by clicking in the font number box at the top to highlight it and type in 400 or any other font you like if you want to make yours a bit bigger than mine.
- Then you print it out. Each letter may print on a single page. Sorry about the waste.
- I then cut out the letters and taped them to the parasol. I kinda rolled up bits of tape and stuck them under the letters.


6. I then traced the letters with a smooth round
point pencil. You don't want a sharp pencil as it
can easily make holes in the parasol.
7. I then used a black sharpie and further outlined it and then just painted it in with a thicker black
sharpie.
And that was it.

For the white ones, I used the same font and wrote the word love in all caps. I couldn't get it big enough to print on one page and after trying a few times, I lost patience and decided to freehand it. I tried to basically follow the image on my monitor and I think I came close. It would have been a hell of a lot better if I had used a stencil but all in all, I think they turned out ok.


Bathroom Baskets
These are my lovely bathroom baskets

First I bought some really hard boxes from Michael's for $1.99 each

I had some royal blue paint from a previous craft project but it was way too dark and nowhere near aqua. So I bought a really small bottle of yellow acrylic paint for 59 cents and mixed them until I was happy with the color.

I then wrapped some white ribbon around the box and stuck it on with 2 sided tape. I then made a bow out of the same ribbon by simply cutting a piece and hot gluing the ends together and wrapping a piece of sheer ribbon around the middle and hot gluing that. I stuck on an aqua jewel (same as I used for my invites). I the stuffed each box with some white tissue to make the box seem fuller and not as deep.

DIY GARTER
For this project, you will need:- fabric
- pencil or chalk
- ruler or tape measure or anything that can take measurements
- pins
- needle and thread
- your choice of decorations
- elastic
- safety pin
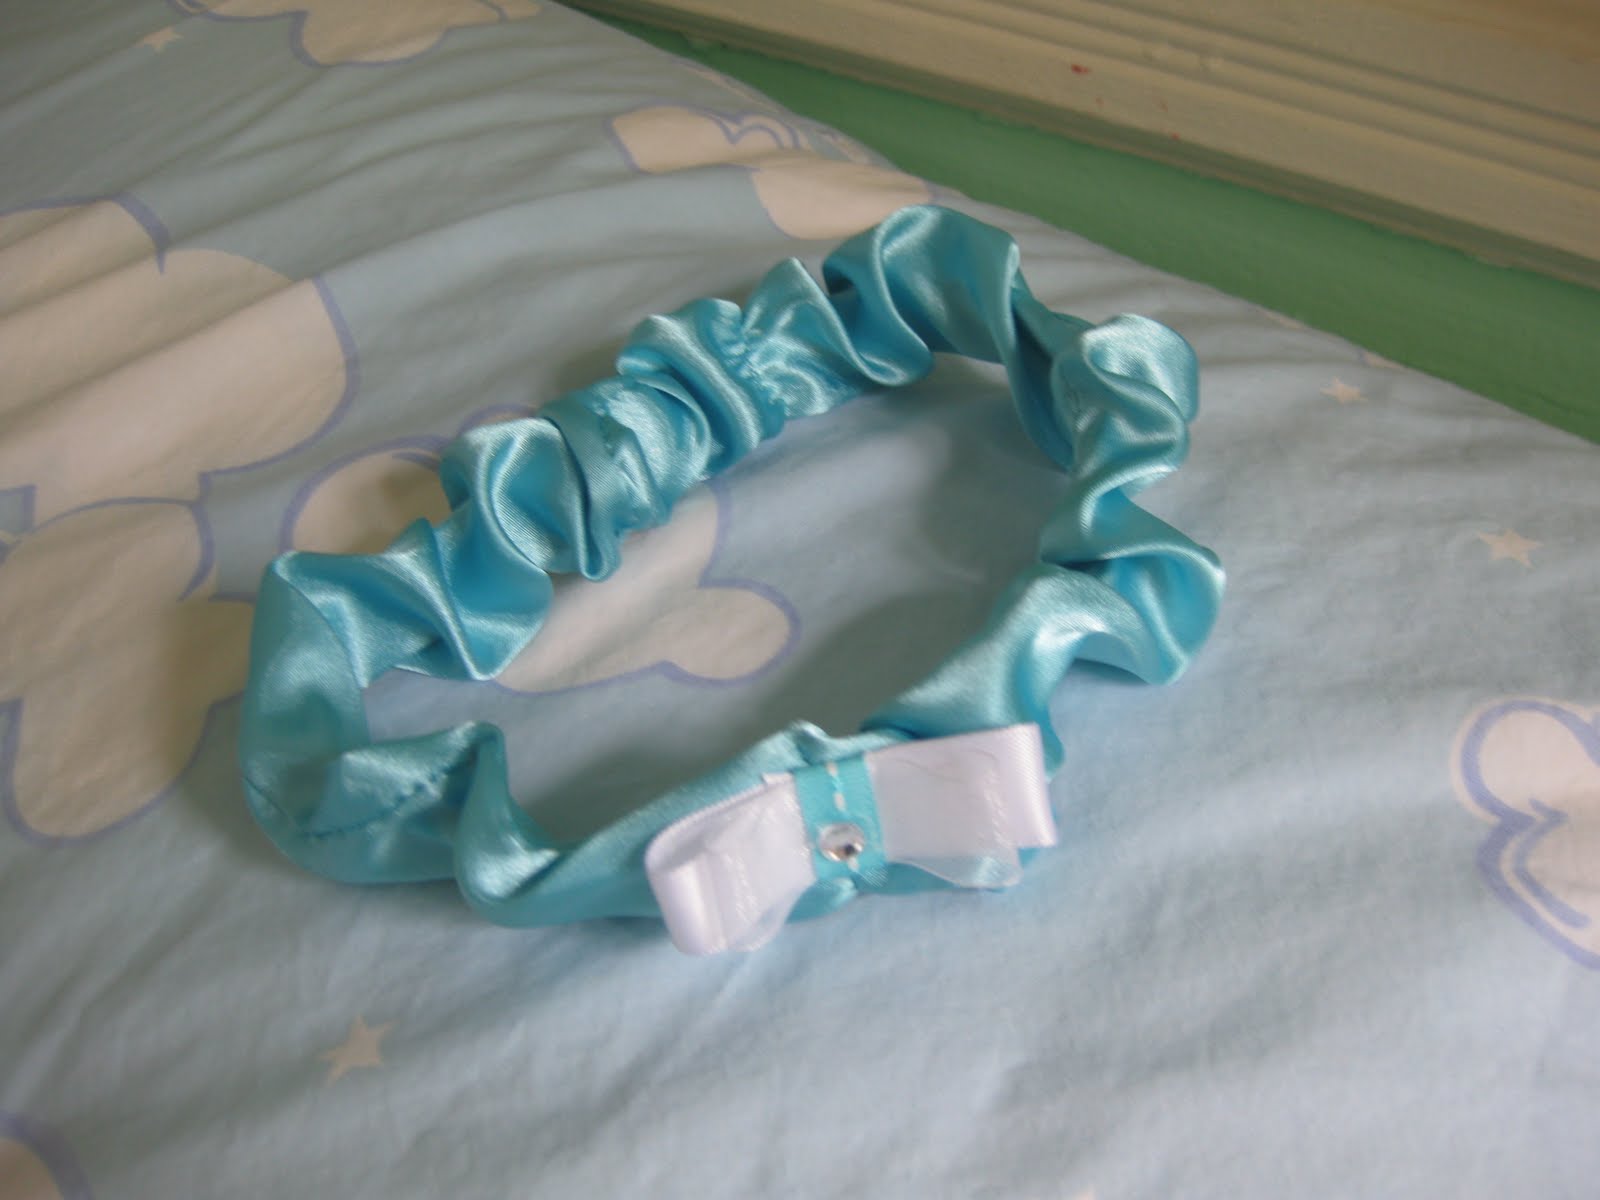
First I measured around my thigh where I wanted to wear the garter and added quite a few inches so that it would scrunch up after I sewed it. I marked that with a pencil and ruler but you can use chalk or something else. Just make sure you can't see it when after you sew it.
Then I measured about four inches wide and cut the strip out. So now I had a strip of fabric four inhes wide and about 20" long.
I then folded the fabric lengthwise inside out and closed it off with pins all along its length.
With aqua thread, I sewed it shut. It now looked like a tube. I left the 2 ends open though so I could slip the elastic through.
I then turned it inside out exposing the shiny fabric by just putting one end into the other and pulling it through.
I then cut a piece of elastic out of one of my son's old shorts (believe it or not) and cut it a few inches shorter than the fabric tube. That way ensuring that would scrunch up when done.
I pinned the safety pin onto one end of the elastic strip and threaded it through tthe fabric tube being careful to hold on to the other end so that it wouldn't just go through the other side.
When the safety pin had come through, I then sewed the two ends together causing it to scrunch up and then I sewed the two end s of the fabric tube together.
To make it a little prettier, I used small pieces of satin and sheer ribbon and made a bow. I hot glued a rhinestone in the middle of the bow and I was done.